Monday, December 23, 2019

Why You Should be Using Canned Tomatoes from Europe for Your Christmas Dinner

I was sent products free of charge as part of the Greatest Tomatoes from Europe campaign in order to facilitate the writing of this post.

Earlier this year, I read Real Food, Fake Food: Why You Don't Know What You're Eating and What You Can Do About It by Larry Olmsted and it really opened my eyes to how little and how much labeling matters in the USA. So many words used on packaged goods like "All Natural" and "Healthy" mean absolutely nothing. A ton of the seafood sold in this country is complete and total lies, from the its listed country of origin to its actual species. And don't even get me started on how deceptive wine labels are in this country!

Why does a government organization like the FDA let companies get away with stuff like this, you might ask? Quite honestly, because as long as people aren't getting horrendously sick, they really don't care. Much of the food industry in America is left to self regulate, so authenticity and honest labeling depends entirely on the integrity of each individual brand. 

In Europe, however, things are very different. Packaged food products are strictly regulated and labeled so that consumers not only know what they're eating and drinking, but also where it came from. Everyone knows that old chestnut about how real Champagne can only come from the Champagne region of France, but did you know that real Parmesan cheese can only come from Parma, Italy? So no, that white stuff in the green cardboard bottle you like to sprinkle on your pasta and pizza is no where near the same thing as a fresh cut wedge of Parmigiano Reggiano. The city of Parma even tried to petition the US government to copyright the name of their signature cheese, but it was ruled that "Parmesan" was a descriptor word for cheese, and therefore could not be copyrighted. Same thing with Cheddar, which should technically only be from the village of Cheddar in Somerset, UK.

Soon after reading Real Food, Fake Food I attended a seminar hosted by the Italian American Chamber of Commerce, which talked about many of the same labeling standards on European goods and instructed us on what to look for. Have you seen a DOC or PDO label on something? That tells you the item has to fit very strict regional regulations in how and where it is made or packaged. Most often you will see those labels on things like wine and olive oil, which are more strictly categorized in Europe (the stuff we sell as Extra Virgin Olive Oil in this county, for instance, would be sold for lamp oil over there!), but once you start looking for them, you'll realize how many European products you could be getting to upgrade your pantry.

Take the humble canned tomato, for example. Used for everything from soups to sauces to jams, canned tomatoes are a pantry staple. Now, this is an objective opinion and not a fact, but a lot of American tomatoes just have absolutely no flavor. There is a reason Italian tomatoes are prized, and it has everything to do with how they are grown and when they are processed. 

When my mother and I began planning our Christmas dinner this year, we decided to make a big pan of lasagna, but with everything made from scratch. As I have taken up pasta making over the last year, creating the fresh noodles would be no issue. And since this was going to be a big special dinner, we decided we should only get the best ingredients. Real Parmigiano Reggiano. Real Buffalo milk Mozzarella. And of course, Italian tomatoes. 

But before we cooked up our big lasagna on Christmas Eve, I decided to test if canned European tomatoes are really all that different from American ones by making a humble Tomato Bisque. Of course, I had to give it a little twist of my own, so I decided to serve it like French Onion Soup by topping it off with a garlic crostini and a thick layer of melted cheese. If I wanted to be really pretentious about it, I could have called it a Re-Imagined Tomato Soup and Grilled Cheese, but since I only want to be a little pretentious, I'm calling it Caprese Soup. My challenge to you, dear reader, is this: Make this soup twice, once using canned American tomatoes, and once using canned European tomatoes and see if you can tell the difference in color, texture, and flavor. If you can, I bet you'll suddenly be searching labels at the grocery store for products of European origin, just like me.

Caprese Soup

2 tablespoons extra virgin olive oil (or any good quality cooking oil)
1 medium yellow onion, roughly diced
3-4 cloves of garlic, chopped
2 14.5 oz cans of whole tomatoes
1 bunch of fresh basil, finely shredded
1/4 cup of heavy cream

Topping
Thin, crispy garlic crostini
1 cup shredded, low moisture mozzarella
1/2 cup slivered Parmesan cheese

Add the oil to a deep bottomed pot, such as a stock pot or a Dutch oven, and bring to temperature over medium high heat. Add onion and saute until the pieces of onion are translucent and slightly golden around the edges. Add in the garlic and cook for about 30 seconds. Add in the canned tomatoes and their juices, then turn down the heat to medium and simmer covered for about 10-15 minutes. Use a stick blender to puree the contents of the pot, then add in the fresh basil, stir, and cook uncovered for another 5 minutes. Turn off the heat and add in the cream.

Use a ladle to fill a stone onion soup bowl with the tomato bisque. Top with 2-3 garlic crostini, then mound on mozzarella and Parmesan cheese until the entire top is covered. Put under a broiler for 2-5 minutes, or until the cheese is completely melted and golden on top.

Makes 2-3 servings.


Tuesday, December 17, 2019

One Dough, Three Cookies: Christmas Thumb Print Cookies with Nielsen-Massey

I was sent products from of charge by Nielsen Massey in order to accommodate the writing of this post. All opinions are my own.

So your boyfriend's best friend's girlfriend suddenly decided to throw a last minute Christmas party. And your office manager suddenly decided everyone should do a pot luck lunch before the holiday. And your kid suddenly remembered the band is holding a holiday bake sale in order to raise funds to get the dents hammered out of the tubas. Not to fear! I'm here to help.


Of course everyone thinks of cookies around the holidays, and everyone has their favorite flavor combos that remind them of their childhoods. The easiest way to please everyone without endlessly sorting through Pinterest for recipe ideas is to find one basic cookie recipe and riff on that.


I, personally, have a great affinity for thumbprint cookies, mostly because they are so versatile that they can be re-invented to accommodate almost any flavor combo. To prove this, I decided to use Nielsen-Massey's Holiday Flavor Bundle as inspiration and create three different thumbprint cookies from the same basic recipe.


First, I made the easy decision to pair the almond extract with cherry preserves. Cherry and almond are such a classic combo, and the bright red center and the creamy white cookie just look so darn festive. Top these cookies with some slivered almonds and watch them disappear (in my own personal testing session at my office, these were the first to go).


Secondly, I decided to be a little adventurous with the vanilla while still keeping within the realm of winter flavor. Nielsen-Massey's vanillas are, after all, top notch and deserve to be featured rather than used as an after thought. For this version, I finely ground some winter spices (cinnamon, clove, nutmeg, and cardamon) and mixed those into the cookie dough along with the vanilla extract. I filled these cookies with a sweet orange marmalade and topped them with a drizzle of melted white chocolate. This version of the cookie might have been my favorite, if only because it reminded me of the orange spice tea my mom used to give me when I was a kid.


Lastly, I decided the pair the peppermint extract with chocolate, because what else is a more quintessentially holiday flavor combo? I altered the base cookie recipe slightly by replacing a 1/2 cup of the flour with cocoa powder and I baked the cookies without any filling. While they baked, I made a quick ganache from dark chocolate, cream, butter, and some more peppermint extract. Once the cookies were cooled, I filled them with the ganach and topped them with crushed candy cane bits.


Tell me what cookie flavor combos you'd like to try in the comments below!


Thumbprint Cookie Base


3/4 cup softened unsalted butter
1/2 cup sugar
1 large egg
1 tsp flavoring (such as vanilla extract, peppermint extract, etc.)
1 3/4 cup flour
1/2 tsp baking powder
1/4 tsp salt

Preheat oven to 350 degrees.

In a medium bowl, cream together the butter and sugar with a hand mixer, then add the egg and extract/flavoring. Add the baking powder and salt. Continue mixing, adding in the flour 1/4 cup at a time until it is all incorporated and the dough has formed. If the dough it a sandy texture, use your hands to finish mixing it until it is one thick mass.

Scoop the cookie dough into 1 inch balls and place them onto a greased baking sheet or a silicon mat. Make an indent with your thumb to create a well in the middle of the cookie. If using a jam-like filling, drop it into the well now. Bake the cookies for about 15 minutes, or until the bottom edges start to go golden brown. Let the cookies cool on a rack for about 15 minutes, then if not already filled, top the cookies with whatever filling you are using.

Makes about 2 dozen.

Tuesday, December 10, 2019

Wine and Cheese: 6 Tips for Building the Perfect Holiday Cheese Plate

I was sent products by Mary's Crackers and Mionetto free of charge. All opinions are my own and I am not affiliated with any of the companies mentioned in this post.

Forget the crudite, forget the charcuterie. If I show up to your holiday party and there is no cheese on your table, I'm leaving. And I brought a damn good White Elephant gift, which I am now keeping for myself. There is just nothing quite like a well curated cheese plate, and I'm not talking one of those pre-sliced, plastic wrapped deals that looks like they just dyed the same block of cheese product different colors. A good cheese plate needs variety, not just in flavor, but in texture. Hard cheese, soft cheese, fresh cheese, aged cheese. Like a wedding. "Something old, something new, something borrowed, something bleu."

I know, it can be intimidating to put together a really nice cheese plate yourself. But I have been doing it for years (I had a friend who once admitted mine was the only house he'd go to outside his own because he knew I'd always have good cheese on hand) and I am here to give you a few tips to help please all the cheese lovers at your next gathering.

1) Aged cheese, like Goudas, Parmesans, and Cheddars are the most common and approachable hard cheeses, but they do get pricey. Good news is, these cheeses are meant to be nibbled on in very small quantities, as they pack quite a punch, so you can get away with smaller wedges. Do not slice these cheeses! Break them into small hunks using a cheese spade. That way you don't destroy the crunchy calcium crystals that give aged cheeses their distinctive texture. Stay simple with something like a 5 year gouda or an authentic Parmesan (produced in Parma, Italy) and you can't go wrong.


2) Fresh cheeses are great for people who like cheese, but aren't fans of the funkier varieties. Fresh mozzarella and burrata are easy enough to find these days, but can be quite messy on a cheese board. I love putting out a bit of goat cheese, since it is sliceable and spreadable, but less of a mess.
Montchevre in particular makes a wide variety of sweet and savory flavors that are excellent. I highly recommend the Honey variety, as it's simple, yet effective. These are perfect for those who prefer to eat their cheese on crackers.


3) Speaking of crackers, CHOOSE CAREFULLY. A lot of flavored crackers will overpower your skillfully selected cheeses. You want something that will function both as a palate cleanser without drying out your mouth and as a vehicle for cheese without shattering into a million pieces after one bite. I recently tried a few varieties from Mary's Gone Crackers and I really appreciate how their extraordinary texture works with cheese. They are jam packed with seeds and whole grains, giving them a lovely crisp snap, but also the strength to not crumble to bits. They are also made with rice, making them gluten free! My money's on the Original flavor, the Black Pepper, the Classic Super Seed, or the Everything Super Seed. 


4) Back to the cheese; don't be afraid of the funk. No, I'm not talking about stinky cheeses. I'm talking about funky flavors. Cheese purists will turn their noses up at the thought of anything infiltrating their cheese's natural flavoring, but adding a bit of something something to a cheese can help make it more accessible to the cheese novices in the crowd. Instead of a simple brie, why not go with something like this Champignon Mushroom from Germany, which is a rinded soft cheese with mushroomy umami flavor. Or instead of a standard cheddar, how about on with truffles in it? Too many savory cheeses on your plate? Go for one of the many varieties of white stilton with fruit in it. I've seen everything from blueberry to mango to apricot, and I have adored them all.

5) Accompaniments are essential. If you really want to make it all about the cheese, I say skip any kind of cured meats all together. Same with nuts. If you want to also have meats or nuts, make those their own things and place them far away from the cheeses so people aren't as inclined to eat everything together. If you're lucky enough to have a decent cheese department at your local grocery store, you may find a variety of unique jams and spreads that will be great accessories to your cheese. Get at least one sweet, one savory, and acidic spread. I like to present things like slices of quince jelly, fig butter, and bacon jam. Just like the crackers, your accompaniments should not only work with the cheese, but function as palate cleansers between bites of cheese. 


6) This is the big one: Wine. What is a good cheese plate without a good bottle of wine to accompany it? Now, I am no wine expert by any means, but all I've ever heard from wine directors and sommeliers is that the most important rule is to drink what you like. The first thing I personally reach for when eating cheese is a sparkling wine. A bright, bubbly, slightly acidic wine really helps to cut through the fat of the cheese and prepare you for each new bite. I really like Mionetto Prosecco Extra Dry because it's affordable, but is still an excellent quality, not to mention completely organic, and it has a subtle floral flavor that I think works really well with most cheeses. If you would rather go all out, I would highly suggest visiting the nearest Wine Cellar location and having them help you pick out a variety of reds, whites, and blushes that will please a crowd. I recently stopped into the Schaumburg location and did a little in store tasting, where I fell in love with wonderful Chardonnay from La Voute and a red blend from Valcatrina that will both be served with my holiday cheese plate. Seriously, there are so many deals to be had at The Wine Cellar that I was actually able to buy 6 bottles of wine for under $75!

And that's it! Now go out there and celebrate Jesus with Cheesus!

Tuesday, November 12, 2019

Thanksgiving Bacon Bourbon Burger Stuffing with White Castle Sliders

I have received monetary compensation from White Castle for the writing of this post. All opinions stated are my own and have not been influenced by or represent those of White Castle.


I've been doing "Friendsgiving" since before it was a buzzword. My very first Thanksgiving in Chicago was spent watching the Macy's Thanksgiving Day Parade with my roommates while preparing an epic feast for all our orphaned city friends. It was the first time I'd ever spent Thanksgiving away from my mom, but also the first time I'd ever cooked a turkey on my own. It was thrilling and sad and joyful and raucous all at once. After that, I started a tradition of doing an all day Thanksgiving potluck for anyone who needed or wanted a place to be. I would spend the whole day cooking various side dishes and desserts so that anyone who had to work that day (a lot of my friends were employed in the service industry) could stop by for a plate of food, a glass of wine, and a hug.

These days, I like to carry on that tradition of cooking up a storm of turkey and carbs with friends as well as practicing my newest tradition; doing a virtual Thanksgiving with my mom, where we FaceTime and eat our traditional meal together while watching Netflix. What can I say? I'm a modern kinda gal!


While I can get pretty protective about my Thanksgiving menu choices, I've always thought that Friendsgiving is my time to get a little weird. What better way to work out a new recipe than to experiment on your friends and either revel in the gastronomic success, or laugh about the failure for years to come (nary a year goes by that I am not reminded about the "Caramel Carrots" incident)? This sort of experimentation has brought great new things onto my Thanksgiving table, like loaded baked potato mashed potatoes, chestnut and butternut squash risotto, and crispy parmesan brussels sprouts. But the one thing I've never been able to create a satisfactory version of myself is stuffing/dressing.


Recently, a very interesting email landed in my inbox. White Castle, sovereigns of the Slider Kingdom, wrote to me with a challenge: turn their iconic sliders into Thanksgiving stuffing. At first, I shook my head in bewilderment, but as I started to mull it over, I realized it was actually pretty genius! People put sausage in stuffing, right? So how different would seasoned ground beef be? The buns obviously would serve as an excellent bread base. And the signature grilled onions that top White Castle's burgers would definitely not be out of place. Everyone I talked about this idea with had the same reaction as me; initial skepticism, and then a dawning realization of just how good it could be. A few herbs, some chicken stock, and boom! Slider Stuffing!


My homeland of Arizona only got their first White Castle last month, so my first experience with the slammable tiny burgers was fittingly during an East Coast college road trip with friends. I have such fond memories of snacking on burgers as we drove into New York City for a weekend of fun, and it was those memories that flooded back to me as I plotted out my stuffing recipe.

White Castle's base recipe is pretty simple: 10-12 sliders (fresh from the restaurant or the grocery store freezer isle), sage, thyme, pepper, celery, and chicken stock. Not being a big fan of celery, I decided to swap that out for some diced green apple. I also decided to add some crisped bacon in honor of my breaded bacon recipe, which I literally have to make for every celebration or party. And what goes with bacon and apples? Bourbon! Thus was born the Bacon Bourbon Burger Stuffing, my newest Friendsgiving success story and the best stuffing I've ever made that didn't involve a box or a canister!

Want to try making this stuffing for your own holiday? Keep an eye on my Instagram, because later this week I'll be giving away a White Castle gift card to one lucky follower!

You can find White Castle's stuffing recipe here, or scroll down for my version!

Bacon Bourbon Burger Stuffing 


10-12 White Castle® Original Frozen Sliders, let to thaw for an hour before use (you can also use fresh, but make sure you ask for no pickles)
1 large green apple, cored and diced
6 strips thick cut bacon
1 1/4 teaspoons thyme, ground
1 1/2 teaspoons sage, ground
3/4 teaspoon black pepper, coarsely ground
3/4 cup chicken broth
1/4 cup bourbon
1/3 cup of halved pecans for garnish

Cut the bacon into small pieces and saute over medium high heat until crispy. Remove the pieces and drain them on a paper towel. In a large mixing bowl, tear the Sliders into small pieces and add the diced apple, crisped bacon, and seasonings. Add the chicken broth and bourbon slowly while tossing the ingredients. Add everything to a casserole dish and bake at 350 degrees for 35 minutes. Top with pecans and serve.

To stuff the ingredients into the cavity of the turkey, prepare ingredients as noted above, but reduce chicken broth to 1/4 cup and the bourbon to 1 tablespoon, then cook as you normally would. 

Makes about 9 cups (enough for a 10-to-12-pound turkey). Note: Allow 1 Slider for each pound of turkey, which will be equal to 3/4 cup of stuffing per pound.

Friday, November 8, 2019

Raw Spice Bar Re-vamp Review

Some products mentioned in this post were provided by Raw Spice Bar for free in exchange for an honest review.

A few years ago, I was contacted by a wonderful subscription service called Raw Spice Bar. I was so impressed with the quality they offered that after sampling one month's worth of their spices and recipes, I purchased a year's subscription for my mom as a Christmas present. Now, with the holidays fast approaching, I was excited to hear that they had recently revamped their service and custom spice blends.

Previously, Raw Spice Bar would send subscribers mystery spice blends in small portions along with recipes that showcased the spices. The only problem was that the spices generally came packaged in small resealable bags, which weren't the most convenient way to store them for later use.

Raw Spice Bar has now re-vamped their service and packaging to be more user friendly and customizable. Customers will be prompted to take a culinary personality test of sorts, and from there will be recommended various spice blends that would be most useful to them from the 150+ varieties they carry. Then, there are options for how frequently you would like to receive the spices (once a month all the way up to once a year). The spices now come flat tins that are easy to open, close, and store, which are clearly labeled, and have clear lids so as to see the contents. Don't want to commit to a subscription? You can also buy the spices a la carte from their shop! You can pick up any number of spices, herbs, or blends in sizes ranging from 1 oz to 10 lbs.

I was lucky enough to try three of Raw Spice Bar's most popular spice blends: the Apple Pie Spice, the BBQ Pork Rib Dry Rub, and the Taco Seasoning. Of course, I had to experiment with these blends using some classic brunch dishes.

For the Apple Pie Spice, I decided I wanted to do some stuffed pancakes. I used an English style pancake (a recipe for which you can find in one of the oldest Bunny and Brandy posts) and then set about making my filling. I peeled and cut 4 Honeycrisp apples into one inch chunks and the tossed them in a generous amount of the spice blend. One unique thing about this spice blend is the addition of grains of paradise, a small peppercorn-like spice that not only added flavor, but texture to my apples. I sauted the apples in some butter until they were soft all the way through. My apples were particularly sweet, so I didn't need to add any sugar to the mix. I then took a block of room temperature cream cheese and whipped it with a little vanilla extract and sugar to make a topping for the pancakes. Since English pancakes are pretty pliable, I was able to stuff them with the spiced apples very easily. I really enjoyed this spice blend because it gave the very sweet apples an almost savory quality, and was definitely more complex than adding just standard cinnamon and nutmeg.


For the Pork BBQ Dry Rib Rub, I wanted to re-create a dish I made when I first tested out Raw Spice Bar's products; spice roasted root veggies. I cut up some small yellow potatoes, rainbow carrots, cremini mushrooms, and a red onion, then coated them in vegetable oil and the BBQ spice blend, then I roasted them for about 45 minutes at 450. The result was outstanding. This particular spice blend has a nice subtle heat that really worked well with the hearty veggies, but it also had a sweetness that was complimented by the onions and carrots. Again, very complex and not your average BBQ seasoning.


Lastly, I decided to use the Taco Seasoning somewhat conventionally by adding it to some ground beef. One thing of note is that these spice blends are salt free so that you can add salt to your own taste. I cooked up a quick omelette and sprinkled it with a Mexican cheese blend. I then topped it off with the seasoned beef, some fresh tomato, and diced white onion to create what I call a White People Taco Omelette, a loving tribute to the Tex Mex style tacos, covered in orange cheese, sour cream, and shredded lettuce that I grew up around in Arizona. I was surprised with how subtle this spice blend was and actually wished I'd added a bit more to the meat. But the flavor was definitely much better tasting than the chemical tasting taco seasoning one can buy at the grocery store. I tasted mostly the coriander, but the addition of several different kinds of chilies gave it a really well rounded flavor over all.


For me, Raw Spice Bar is still killing the spice game, and I really appreciate their new stackable storage containers. The thing I love most about this kind of service is that it really encourages me to step outside my flavor box and start thinking creatively. And for someone like me, who gets nervous about how to properly season their food, that's really saying something!

Monday, October 14, 2019

Chicago Gourmet 2019 Recap: A Glutenous Timeline


Another year, another fabulous Chicago Gourmet. In the past I've come at this recap in a number of ways; giving you my best of, giving helpful tips of how to navigate the festival, demonstrating food trends based on the dishes being served, etc. This year, I figured I'd try something a little different and give you as much of a behind the scenes peek into what my day covering the biggest food festival of the year is really like. So, got your walking shoes on? Good, because it's pretty darn damp out here from all the rain. Let's go!

12:00 pm- The festival is officially open! While everyone else gets their barrings/heads for the Supreme Lobster tent, I spot the return of an old friend: the Four Corner's tent. In years past, they've been my go-to first stop because they are always ready and raring to go while other tents are still plating. This year they were featuring Carnitas Tacos and customizable mini margaritas from Federales.


12:15 pm- After wandering around for a bit and taking some atmosphere shots, I spotted Christina from Chritiques and we sauntered over to the Mariano's Tasting Pavilion to get our first loaded plates of the day. Best of the Tent: Brian Jupiter's (Ina Mae/Frontier) Smoked Boar Tacos and Michael Galen (Dusek's/Punch House) Spice Roasted Cauliflower with lemon tahini, walnut and pomegranate. This tent also showcased two odd, but fun brand features. Murray's Cheese handed out tiny curated cheese plates with tasting cards, while Fanny May had some of their signature chocolates. At least Fanny May's goodies I could shove in my bag for later, but I'm not gonna lie... the tiny cheese plate was an odd choice for an event like this.


12:30 pm- The decision was made between Christina and I to hit up the Keeping Up with the Konfections dessert tent while the line was short. Eli's Cheesecake really surprised me with their feature of a new product: tiny goat's milk cheese cake bites, called Cubies (because they're tiny cubes!) drizzled with honey. I would have eaten the entire bag if I hadn't been pacing myself!


12:45 pm- The US Foods tent was in full swing by this point, so we joined the growing line. The standout here was Giancarlo Valera's (Tanta) shrimp cebiche, a dish I'd actually had the opportunity to learn how to make a few weeks ago. Funnily enough, raw seafood dishes used to be an overwhelmingly common sight at Chicago Gourmet, but this was the only one I encountered this year!


1:00 pm- Christina and I bid our farewells as she headed off to meet some friends, and I popped over to the Thai Select tent. Wipavadee Iamsakul from Kinnaree Thai Kitchen served my favorite dish here: some skewered pork with a fresh salad on the side. The gals at Siam Rice Thai Cuisine were NOT kidding around when they said their Thai Basil Chicken was a LITTLE spicy, so I immediately headed off to some of the smaller tents in search of liquid refreshment.

1:15 pm- Fever Tree bottled mixers had some lovely, refreshing cocktails at their table. Absolute Vodka was featuring their new line, Absolute Juice, mixed with sparkling water. Sparkling cocktails seemed to be all over the place. I'm sure it had nothing to do with the country's obsession with White Claw this past summer...


1:30 pm Quick stop at Tao's tend to sample their Peking Duck Rolls was totally worth it. Then I headed over to the Gardens of the Galaxy Veggie tent, because the amount of heavy meat dishes I'd been given to far was already starting to wear me down. Sandy Chen (Koi/Le Sud/Club 77) had some adorable veggie sushi rolls with the different colored wrappings denoting different flavors.


1:45 pm- Started to hit a wall, so I grabbed cold brew from La Colombe's tent and headed to the Gordon Food Service tent for last round from the heavy hitters. God bless the volunteer working this tent who briefed everyone waiting in line on what dishes were inside with the detail of a fine dining server. After skirt steak, octopus, beef cheek, and smoked salmon mousse, It was the Jackfruit and Papaya Noodle Salad from Jonathan Meyer at Flora and Fauna that I found most delicious, if only because it wasn't meat or bread.


2:00 pm- Time to stop into the Choose Chicago media tent for a quick break. Unfortunately for me, the media tent had a table full of delicious looking food! I was in such a daze at that point (from all I'd eaten and drunk, but also because the humidity had drastically risen), so I don't seem to have made a note about what the food was or who made it... but I did take pictures. Because that's just muscle memory for me at this point. See pretty food, take pictures of it. Done.


2:30 pm- This is always the time I head to the mainstage to take in a few demos while the tasting tents change over for the afternoon session. Sarah Grueneberg and Fabio Viviani made for a delighful pair of pasta making Top Chefs, and it was a total thrill to get to see Masaharu Morimoto expertly butcher a 130 pound tuna like it was something he does every day. Actually, he probably does do that every day.


3:30 pm- Time to get back to eating! First stop was the hidden gem S Rosen's Sandwich tent, where Julius Russell (A Tale of Two Chefs) had the fanciest grilled cheese sandwich I've ever seen, packed with slow roasted short rib, truffle oil, and caramelized shallots.


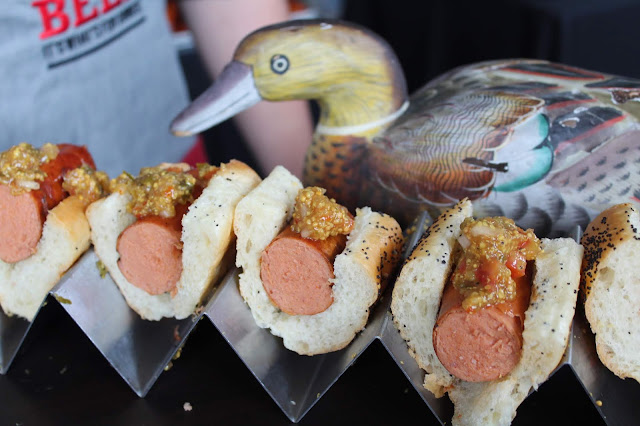
3:45 pm- Back over to the Mariano's tent. This time, it was the Duck Fat Hot Dogs from Kevin Hickey (The Duck Inn) that caught my attention. Also catching my attention was my good friend Mihaela from Chicago Loves Panini, who tagged along with me for the final rounds of the festival.


4:00 pm- Another trip to the US Foods tent. Two things here had people talking; Brian Jupiter's Gator Sausage sandwich, which initiated many Chance the Snapper comments, and Carlos Gaytan's Chicken Mole Tacos. This was the first taste many of us had had of Carlos's food from his new restaurant Tzuco, a tribute to the cuisine of his home town.


4:15 pm- Last big tent of the day; a return to the Gordon Food Service pavillion, where the amazing volunteer lady was still giving detailed menu spiels to the waiting crowd. Though I was full, I was so happy to get a taste of the Pork Belly and pork shoulder with arugula slaw and grape must from Louie Alexakis at Avli Tavern, because he has always brought such stellar dishes in previous years.


4:30 pm- A few more walk abouts before the whole festival started to shut down resulted in an adorable souvenir mug from the Iichiko Sochu tent, a bite of a stellar Japanese egg salad sandwich topped with caviar from Guy Meikle at Heritage Restaurant and Caviar Bar, and some much needed Resilient juice from Natalie's Cold Pressed Juices.


And thus ended another stellar, ridiculous, glutinous, entertaining, and exhausting year at Chicago Gourmet! Check out my Facebook page for all the photographic proof of my hunger. Until next year!